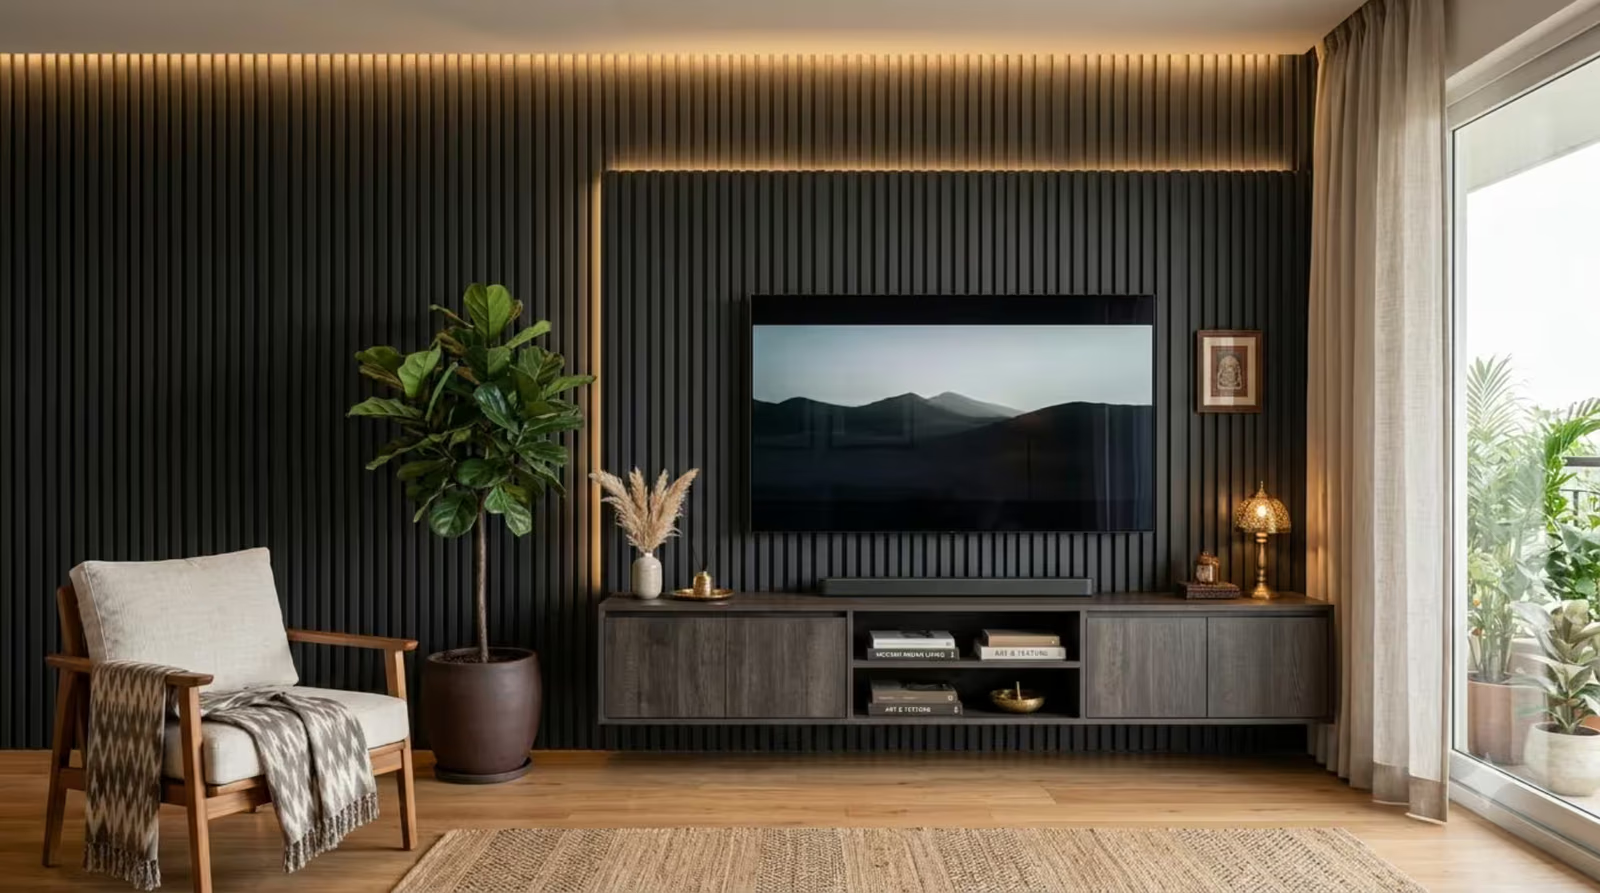
Yes, but not to the louver panel. The TV has to be anchored to the structural wall behind it, and the panel passes over or around the bracket without carrying any of the weight.
That distinction sounds like a technicality. It is the whole answer, and getting it wrong is how people end up with a cracked feature wall and a television on the floor.
Most suppliers avoid this question because the honest answer sounds like a limitation. It is not. Done properly, a louver wall with a TV on it is no less secure than a bare brick wall with a TV on it. It just needs deciding before the panels go up, not after.
Why the panel cannot take the load
WPC louvers are decorative cladding. They are a blend of wood fibre and thermoplastic, typically around 60% wood fibre and 30% HDPE with additives making up the rest, formed into profiles between 9mm and 20mm thick.
They are fixed to the wall with clips and construction adhesive. That system is designed to hold a panel weighing a couple of kilos flat against a wall. It is not designed to resist something pulling outward and downward at the same time, which is exactly what a wall-mounted television does.
Consider the numbers. A 55 inch TV weighs roughly 15 to 20 kg. A 65 inch is usually 20 to 32 kg. A 75 inch can pass 35 kg. Then add the bracket, and add the leverage if the bracket articulates. None of that load belongs on a 9mm decorative profile stuck to a wall with silicone.
The masonry behind is a different story. Solid brick with correctly sized anchors gives combined holding power in the range of 80 to 140 kg, comfortably above a 25 kg television even allowing for the dynamic load from a tilting bracket. So the load path you want is simple: TV to bracket, bracket to masonry, panel not involved.
Three ways to do it, best first
Plan a backing plate before you panel
This is the method a good installer will push for, and it produces the cleanest result.
Before any panels go up, fix the bracket position on the bare wall. Either mount the wall plate itself, or fix a plywood or steel backing plate to the masonry at TV height, sized larger than the bracket footprint.
Then panel around it. You either leave a recess where the bracket sits, or you notch the panels so the bracket arms pass through while the panel face stays continuous. The bracket is bolted to brick or concrete. The louvers sit around it, touching nothing structural.
The catch is that you need to know your TV size and mounting height before the wall is built. Bring the model number to the design conversation, not after.
Through fix after the panels are up
If the wall is already clad, you drill through it. This works, and it is common, but it needs one detail that almost nobody mentions.
Louvers are often installed on a batten frame, which leaves an air gap between the panel back and the masonry. When you tighten a bolt through a panel that has a void behind it, the panel is what gets compressed. At best the profile bows and the bracket sits on a springy surface. At worst the panel cracks along a groove, where the section is thinnest.
The fix is a rigid spacer. Fit a metal sleeve or tube through the cavity, cut to the exact depth of the gap, so the bolt clamps against the spacer and the masonry rather than against the panel. The panel then just sits there, decorative, doing nothing.
This is the same principle used on dot and dab plasterboard walls, where long frame fixings bridge the adhesive gap and seat into the block behind. The panel is a passenger, not part of the structure.
Two more things on this method. Drill through the flat face of the profile, never the groove valley. And leave the bolt hole slightly oversized so the panel can move independently of the bracket, which matters for the reason in the next section.
Mount independently of the wall
A floor standing TV stand or a ceiling mount sidesteps the problem entirely. Worth considering if the louver wall is already finished, if the wall behind is a hollow partition, or if you might rearrange the room later.
Thermal movement is the reason for that oversized hole
WPC expands and contracts with temperature. Figures published for decking put the movement at roughly 4mm across a 4 metre length over a 30 degree swing, so a wall height panel moves proportionally less, but it does move.
Now picture a panel bolted tight against a bracket that is rigidly fixed to masonry. The masonry does not move. The panel tries to. Something has to give, and it will be the panel, which is why tightly clamped panels cup or buckle in the months after installation rather than on day one.
Give the bolt a couple of millimetres of clearance in the panel. Let the panel float.
Your wall type decides the anchor
This is where Bangalore installations go wrong, because not every wall here is solid brick.
Solid brick or RCC - The straightforward case. M8 or M10 expansion bolts are standard for concrete. Drill into the solid material, not the mortar joint, because the joint holds far less.
AAC block - Extremely common in Bangalore apartments, sold as Siporex, Aerocon and similar. Aerated block is much softer than brick and standard plugs will pull straight out of it. You need anchors made for aerated block, or injectable chemical resin used with a mesh sleeve that stops the resin running into the pores. Expect lower load figures than brick, which means more anchor points and wider spacing to spread the load.
Gypsum or drywall partition - The hardest case, and the one where the answer is sometimes no. A hollow partition with louvers on it has nothing behind to anchor to unless backing was added when the partition was built. If your feature wall is a partition, raise it before anything is clad.
If you are not certain which you have, knock on the wall. Solid masonry gives a dull, uniform sound. Hollow construction sounds like it is hollow. When it is not obvious, ask the installer to check before the panels go on rather than after.
TV size, weight and VESA reference
| Screen Size | Typical Weight | Common VESA pattern |
|---|---|---|
| 43 inch | < 15 Kg | 200 x 200 |
| 55 inch | 15 - 20 Kg | 300 x 300 to 400 x 400 |
| 65 inch | 20 -32 Kg | 400 x 400, some 600 x 400 |
| 75 inch | 35 Kg + | 400 x 400 to 600 x 400 |
| 85 inch | 40 - 60 Kg | 600 x 400 |
VESA is the centre to centre spacing of the four threaded holes on the back of the screen, measured in millimetres. Two 55 inch televisions from different brands can use completely different patterns, and patterns change year to year inside the same model line. Measure your own, or look up your exact model number. Screen size alone tells you very little.
Buy a bracket rated well above the actual weight of your screen. Around 25% headroom is a sensible minimum for a fixed mount, and more for an articulating arm, because extending an arm multiplies the pull on the anchors.
Where the bolts land on the profile
Louver widths vary, and the width you choose changes how the bracket sits.
A narrow louver profile is around 7.67 inches wide, roughly 195mm. A 400mm VESA span therefore reaches across about two panel widths, so your two bolts land on separate panels. A wide plank profile is around 16.25 inches, roughly 413mm, so a 400mm span sits within about one panel width.
Neither is better. What matters is that you know before the layout is set, so panel joints do not land exactly where a bolt needs to go. Mark the bracket footprint on the bare wall and plan the panel run around it.
Cables, before you clad
Every cable you will ever need behind that TV has to be in place before the last panel goes on. Power, HDMI from the console or set top box, ethernet if the TV is wired, and one spare conduit for whatever you buy in three years.
If the panels sit on battens, the cavity behind them is already a usable route. If they are stuck directly to the wall, chase the conduit into the masonry first.
Retrofitting a cable after the wall is finished means pulling panels off. Adhesive fixed panels rarely come off cleanly, and matching a replacement to a batch you bought a year ago is not guaranteed.
Checklist before anyone drills
Confirm the TV model, weight and VESA pattern. Confirm what the wall is actually made of. Decide the mounting height with somebody sitting on the sofa, because the centre of the screen wants to be near seated eye level and that is lower than most people guess.
Then mark the bracket position on the bare wall, run the cables, and only then start panelling.
If the wall is already clad and you are drilling into it, use the spacer. If the wall turns out to be a hollow partition, stop and get someone to look at it. A television coming off a wall is not a finish problem.
Frequently Asked Questions
No. The panels are decorative cladding fixed with clips and adhesive, and they hold only themselves. The bracket must anchor into the brick, concrete or block behind the panel.
Yes. Drill through the panel into the masonry using anchors long enough to reach it, and fit a rigid spacer through any cavity so the bolt does not clamp against the panel itself.
It can, if you drill through a groove where the section is thinnest, or if you overtighten against an unsupported panel. Drill through the flat face, use a spacer, and leave slight clearance around the bolt.
Yes, and it is the single most useful thing you can do. Knowing the TV size and mounting height in advance lets the bracket go on the bare wall and the panels go around it, which looks better and is stronger.
Not without backing inside the partition. If the partition was built without it, you need either a floor standing or ceiling mount, or the partition opened up and reinforced.
Same rules, higher demands. An extending arm increases the leverage on the anchors, so use more anchor points, a higher rated bracket, and be more careful about the wall material.